Welcome to the SUNLU Filament Connector FC01 tutorial! Today, we'll show you how to use this useful 3D printing accessory. Whether you're a beginner or an experienced maker, the FC01 is your new printing ally.
🧐Are U Ready? Say goodbye to leftover filament. Use every last inch of your material!!!🥳
🔎Before you use it, make sure you have everything below. Among the regular 1 unit pack, you'll get:
--- 1* FC01 filament connector,
--- 1* User manual,
--- 1* Micro-USB cable (Power adapter not included. Use at least a 5V 2A adapter to avoid power-on issues)
--- 1* Teflon tubing (about 200 pieces, 200±20pcs)

the Packing List of Default 1 Unit
⚙️Basic Usage
Power it up and use our Micro-USB cable that comes with the product, again, it needs a supply voltage of at least 5V 2A, below that it won't have enough power to start. Please use the original cable for the use of the machine, otherwise we will not provide after-sales service in case of quality problems due to the use of a non-original cable.

Once powered on, you can view what's on the screen and adjust it to your needs.
Top Right Button: power on/off
▶️Bottom Right: for selecting what you want to adjust (filament type or temperature), when selected, the selected content will flash to remind.
🔼Up / 🔽Down on the left: to adjust the filament preset type or temperature according to your choice above

While waiting for the machine to heat up, you can prepare the filaments you need to make the connections (either a broken new filament or using leftover remnants is fine), but note that they must be of the same type and material.

🧲Starting Connection Usage
A tip for a successful connection, it's best to cut diagonally so that the filaments on both sides have plenty of contact area. Then, using the Teflon tubing supplied with the product, connect the ends of the filaments to be connected to the Teflon tubing beforehand.

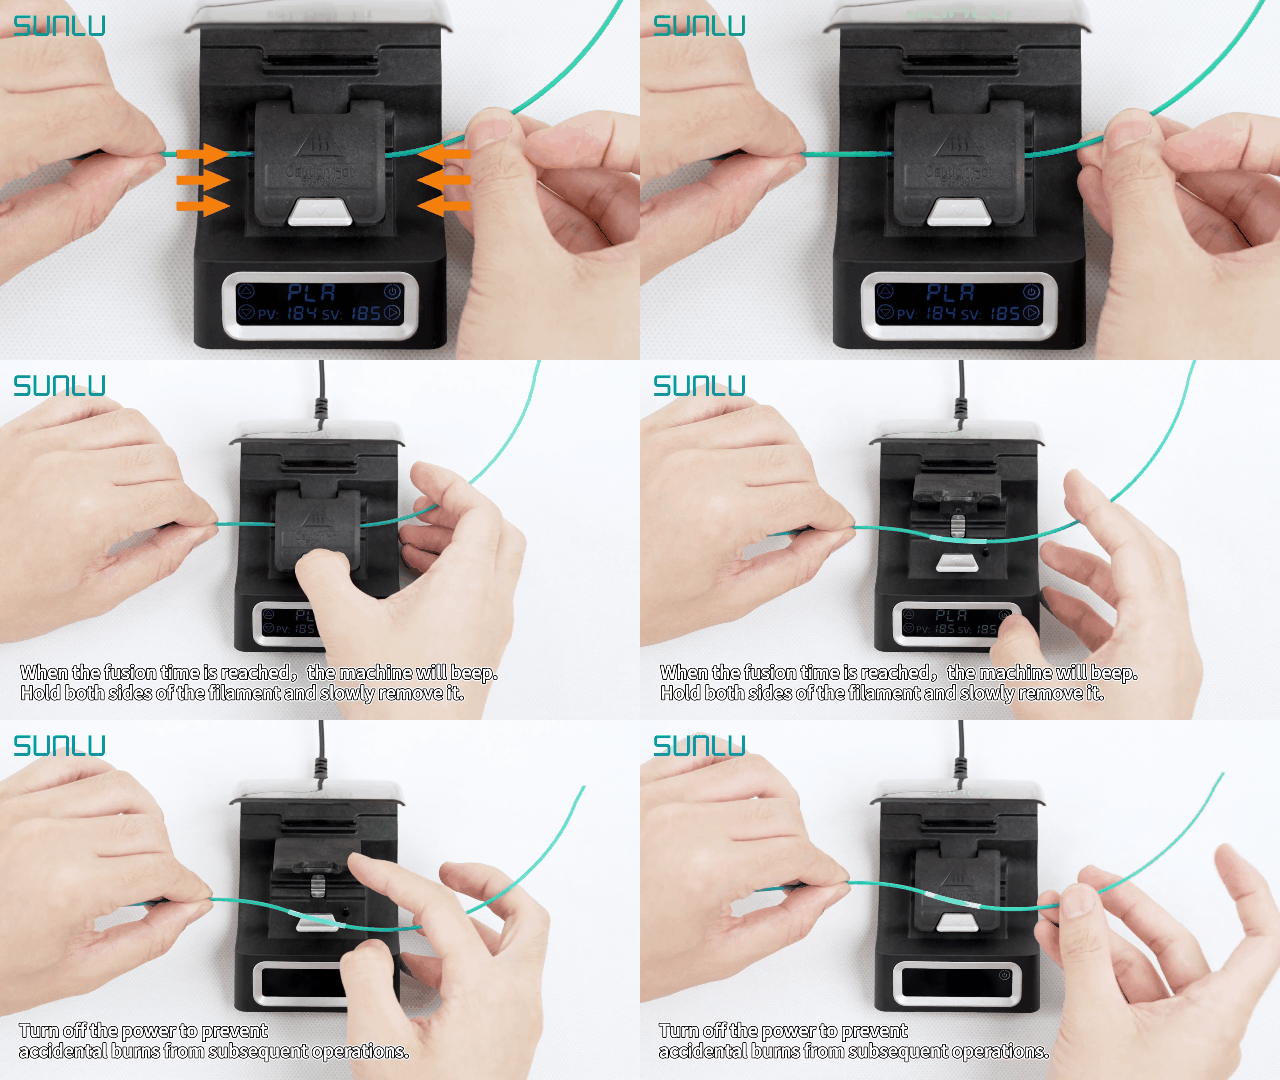
The machine will beep to alert you when it has finished heating. At this point you can lift the outer transparent cover and press the inner silver button (do not touch the black inner cover, it is very hot), the inner cover will pop open and you can place the filament in.

Note that the intersection of the filaments that need to be connected should ideally be placed right in the center.

During the heating process, in order for them to make a full connection, you can give the filaments at both ends a slight squeeze from the outside to the inside.

🖇️Processing after connection completion
Once the filament is connected (at a preset time inside the machine) it will beep again, at which point press the silver button again to open the cover and remove the filament. For safety reasons, we recommend that you turn off the machine by hand.

After removing the filament, you might consider letting it cool naturally for a little longer. You may also choose to use a fan or other item that can cool it down to cool it down, usually 5 to 10 seconds.
Finally, use the cutter at the rear of the connector to remove the Teflon tubing.

♻️ If your filament ends are closer together, you can also remove the Teflon tubing directly from the closer end, which allows you to recycle to a certain extent, reducing waste and saving money.
🙋♂️🙋♀️Have you learned these tips yet? Come get your own filament connector and try it out!

